Documentation Index
Fetch the complete documentation index at: https://docs.flickerwall.com/llms.txt
Use this file to discover all available pages before exploring further.
Step 1
Access the Setup Menu: Press the Settings or Setup button on your remote control and select OK to enter the menu.
Step 2
Open the EZ Settings
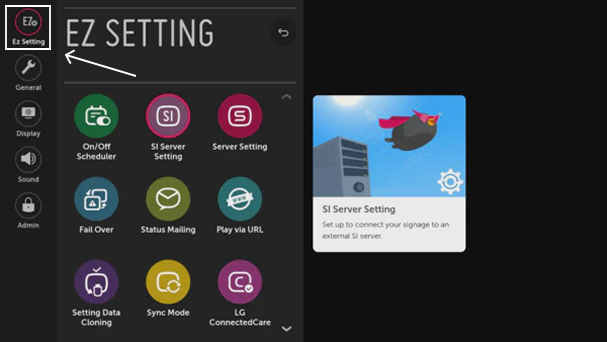 Step 3
Open SI Server Settings:
Navigate to and click on SI Server Setting to begin the configuration.
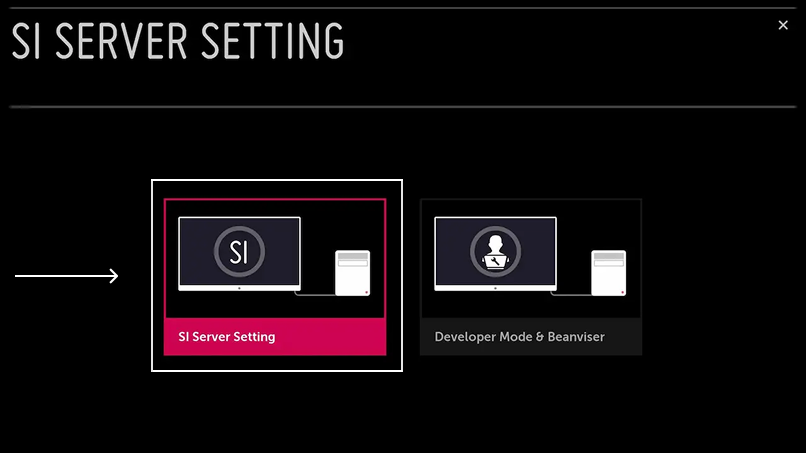
Step 3
Open SI Server Settings:
Navigate to and click on SI Server Setting to begin the configuration.
 Step 4
Enable FQDN and Provide the Application URL
Turn on the fully qualified domain name and type the following URL using the keyboard or remote:
(flickerwall ipk link)
(image)
Step 5
Configure SI Server
On the settings menu, set the following fields with the values provided. The following fields are marked in the screenshot below.
Step 4
Enable FQDN and Provide the Application URL
Turn on the fully qualified domain name and type the following URL using the keyboard or remote:
(flickerwall ipk link)
(image)
Step 5
Configure SI Server
On the settings menu, set the following fields with the values provided. The following fields are marked in the screenshot below.
- Application Launch Mode: Local
- Application Type: IPK
- Local Application Upgrade: Remote
(image)
Step 6
Confirm Remote Upgrade
After clicking on REMOTE, you will get an Application Upgrade confirmation pop-up > Click on CONFIRM.
(image)
Step 7
Complete Installation
It will show a success message after the completion of the installation. Click on ‘OK ’ and reboot the device.
(image)
Step 8
Verify the Flickerwall Player
the Flickerwall WebOS player would now be appearing on your display’s home screen
(image)
Step 9
Launch the Flickerwall App
Press the Home button to see the Pickcel app on the home screen and select the flickerwall app. Press the OK button on the remote to launch the app.
Step 10
View the Registration Code
Once the app is launched, it will take a couple of minutes to connect to the internet. After the internet is connected, it will show a six-digit unique Screen Registration Code, which you will use to pair this device Flickerwall
(image)
And with that you’ve Installed the Flickerwall player successfully.
Get Flickerwall Today or start a Free Trial Now