> ## Documentation Index
> Fetch the complete documentation index at: https://docs.flickerwall.com/llms.txt
> Use this file to discover all available pages before exploring further.
# How to Add a User?
> Learn how to add a User to your Profile so you can distribute your work and be more efficient
***
Step 1
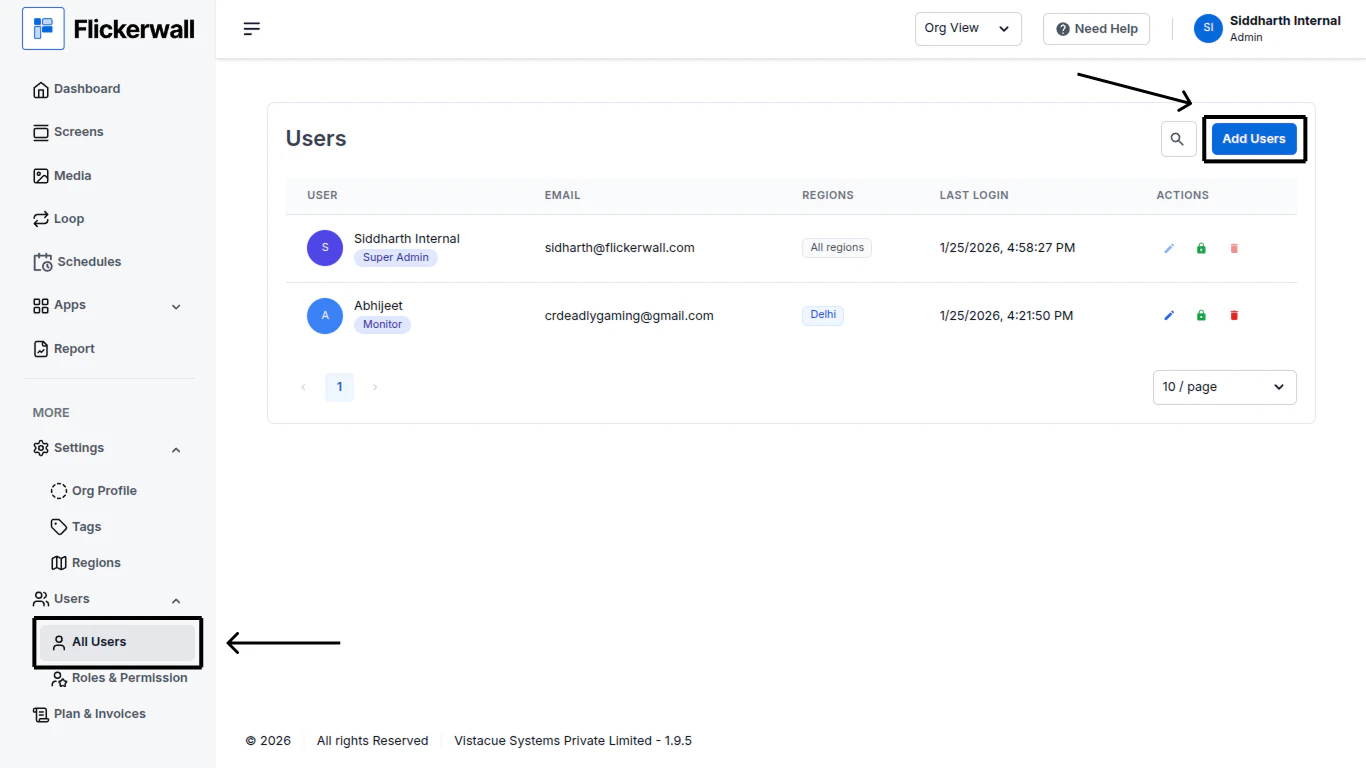
Go to the “All Use” Module and click on ”Add User”
 Step 2
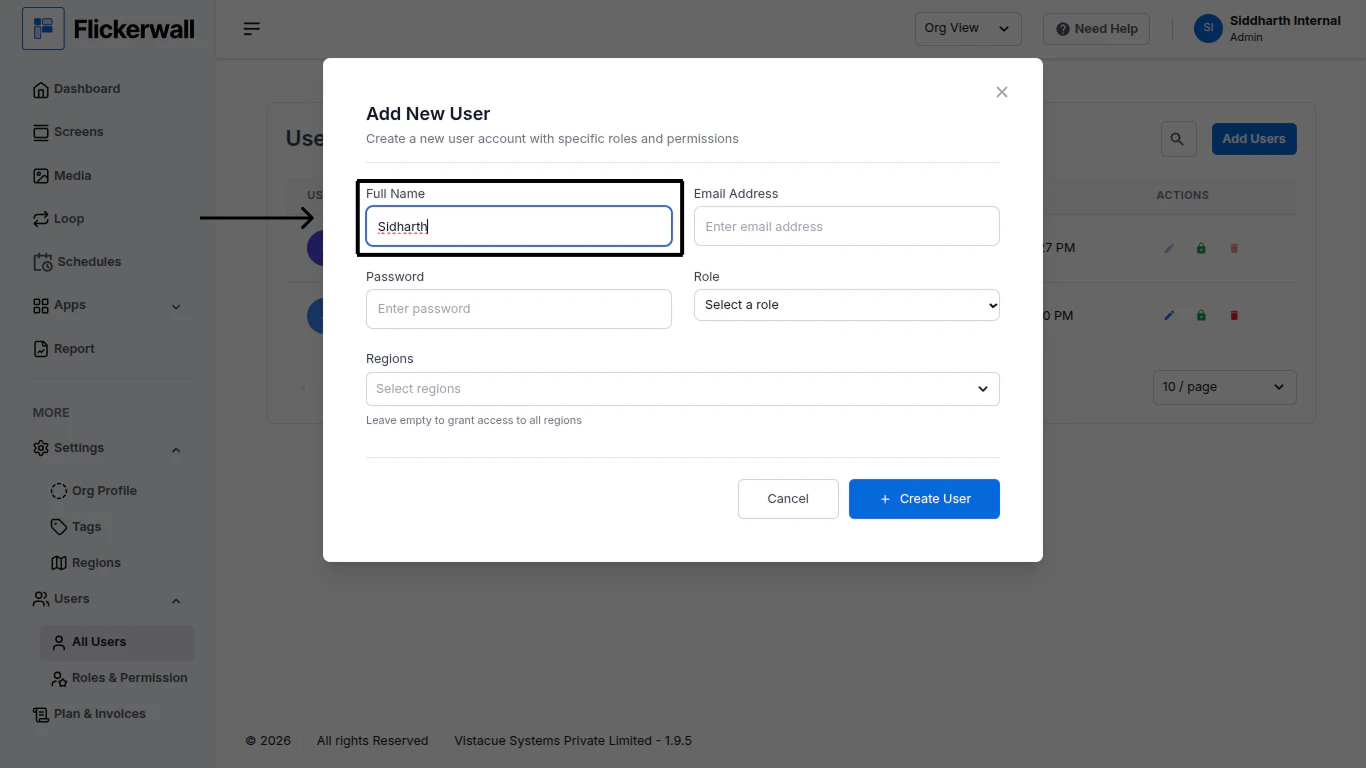
Enter the User Name
You can write just the name or a full name depending on how you prefer
Step 2
Enter the User Name
You can write just the name or a full name depending on how you prefer
 Step 3
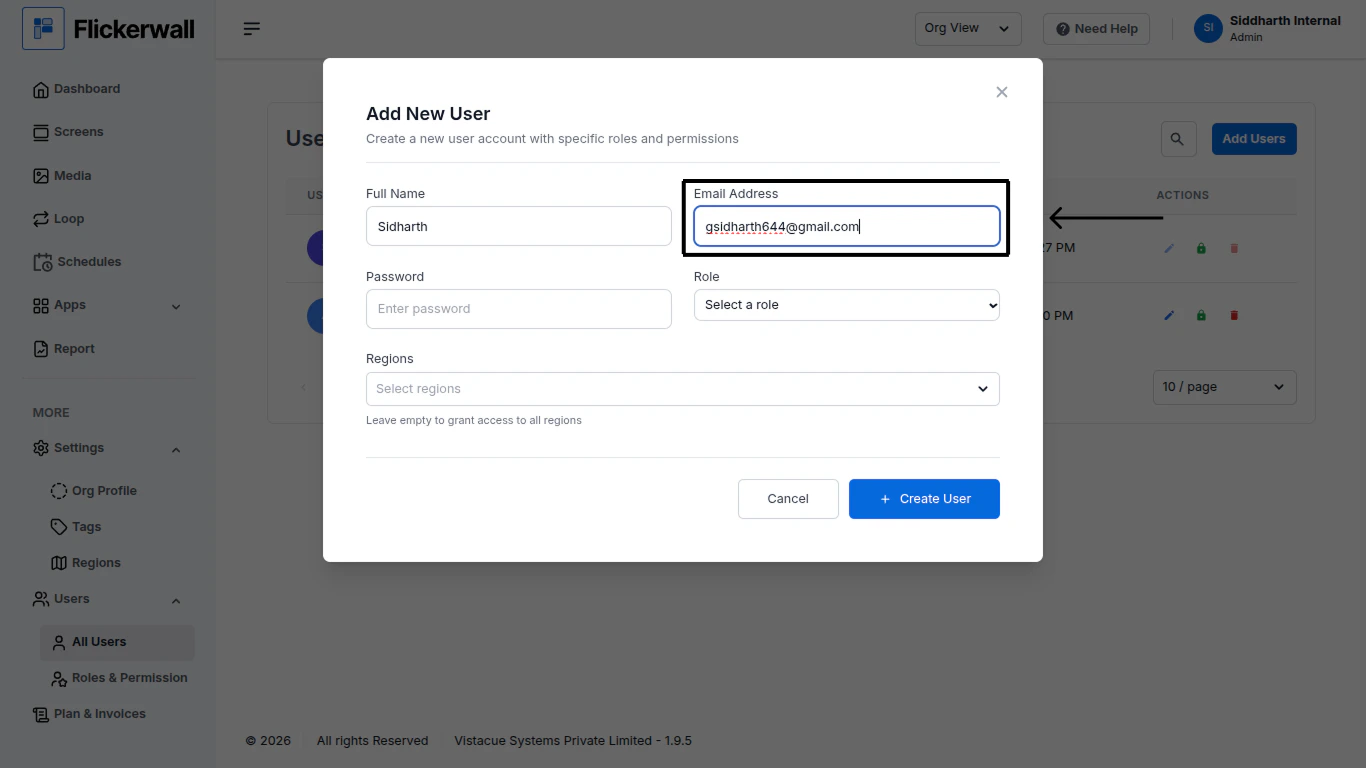
Enter the User’s Email Address
(Note: Enter a correct Email Address , they will receive a verification message in their Email Box)
Step 3
Enter the User’s Email Address
(Note: Enter a correct Email Address , they will receive a verification message in their Email Box)
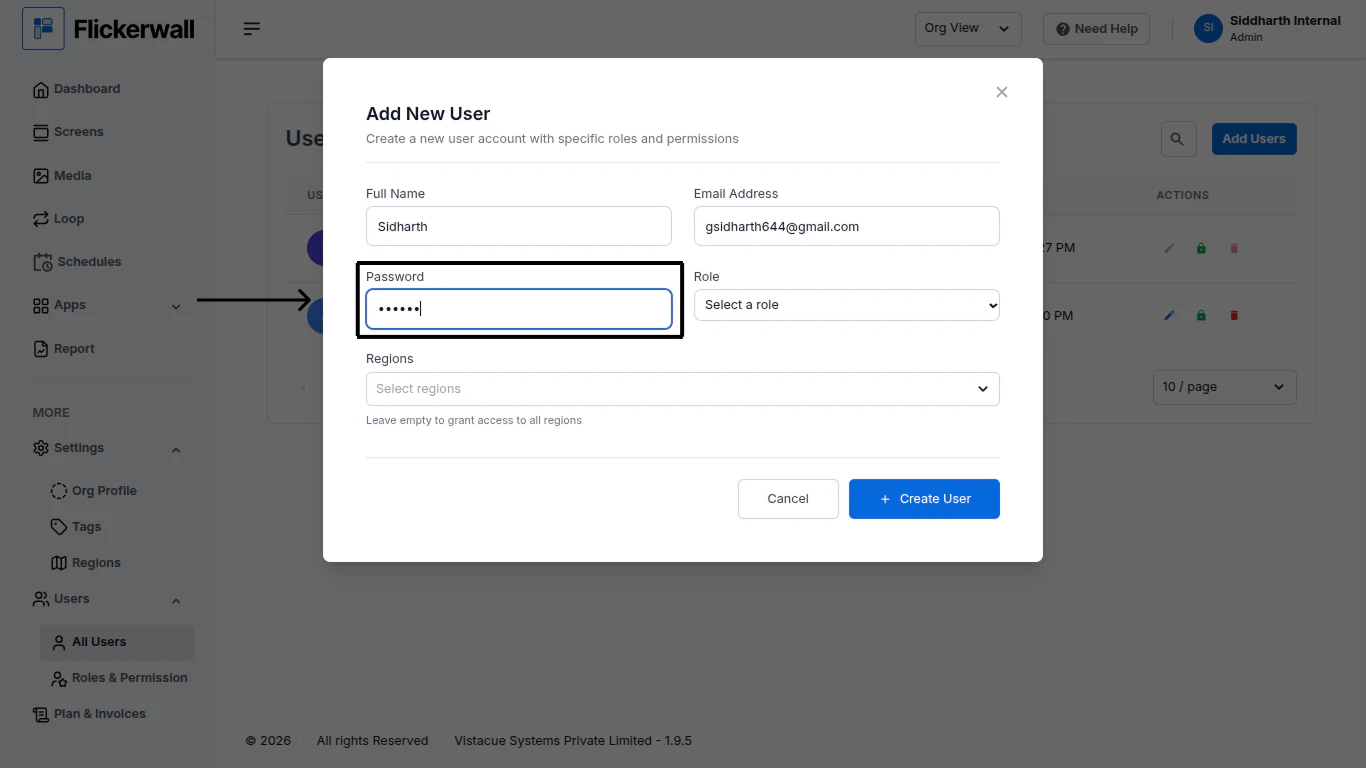
 Step 4
Make a password
(Note: Please ensure you make an easy password to remember because this password will be used by the user to login in their workspace)
Step 4
Make a password
(Note: Please ensure you make an easy password to remember because this password will be used by the user to login in their workspace)
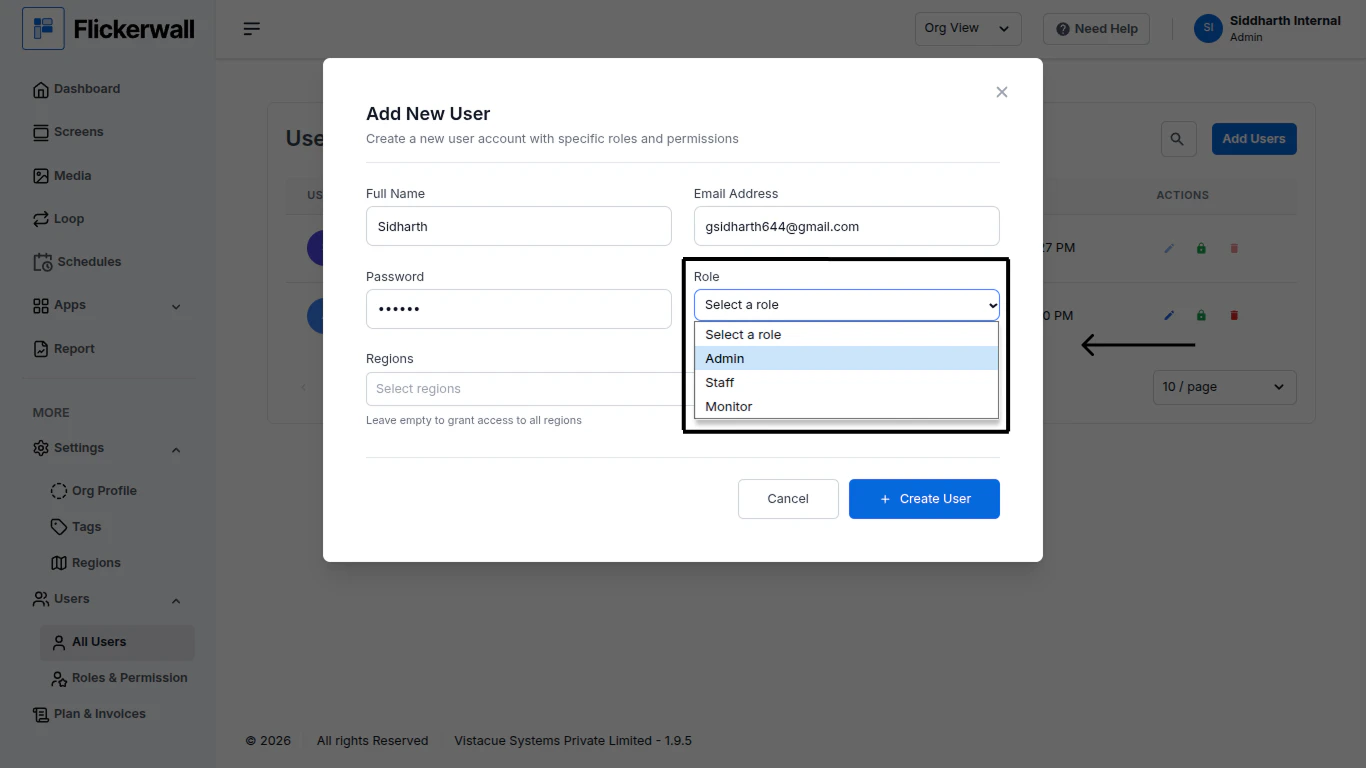
 Step 5
Select a Role for the User
Select a Role for a User which will give them access to features you decided for the “Role” to have
Step 5
Select a Role for the User
Select a Role for a User which will give them access to features you decided for the “Role” to have
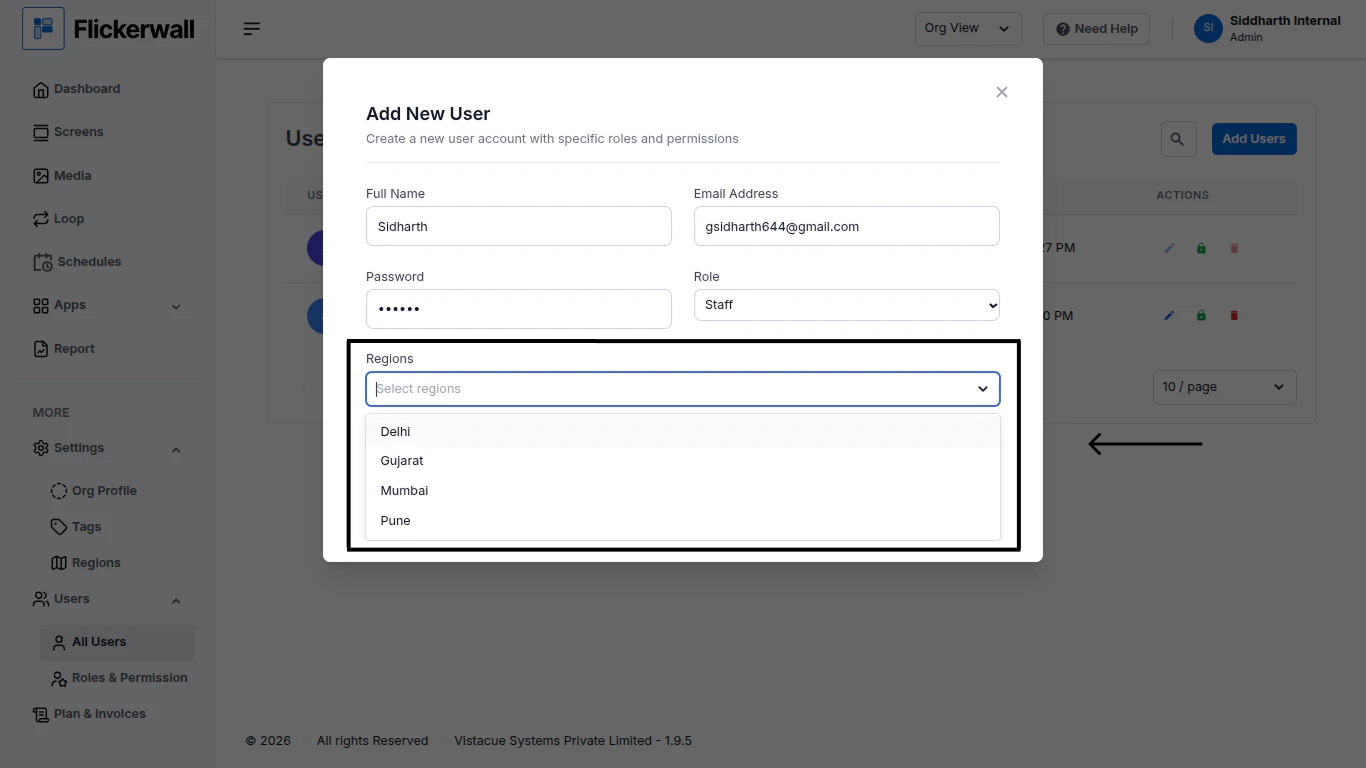
 Step 6
Select a “Region” for the User
Select a Region if you want to give access to only one region to the User
If you want the User to have access to all the regions keep this column empty
Step 6
Select a “Region” for the User
Select a Region if you want to give access to only one region to the User
If you want the User to have access to all the regions keep this column empty
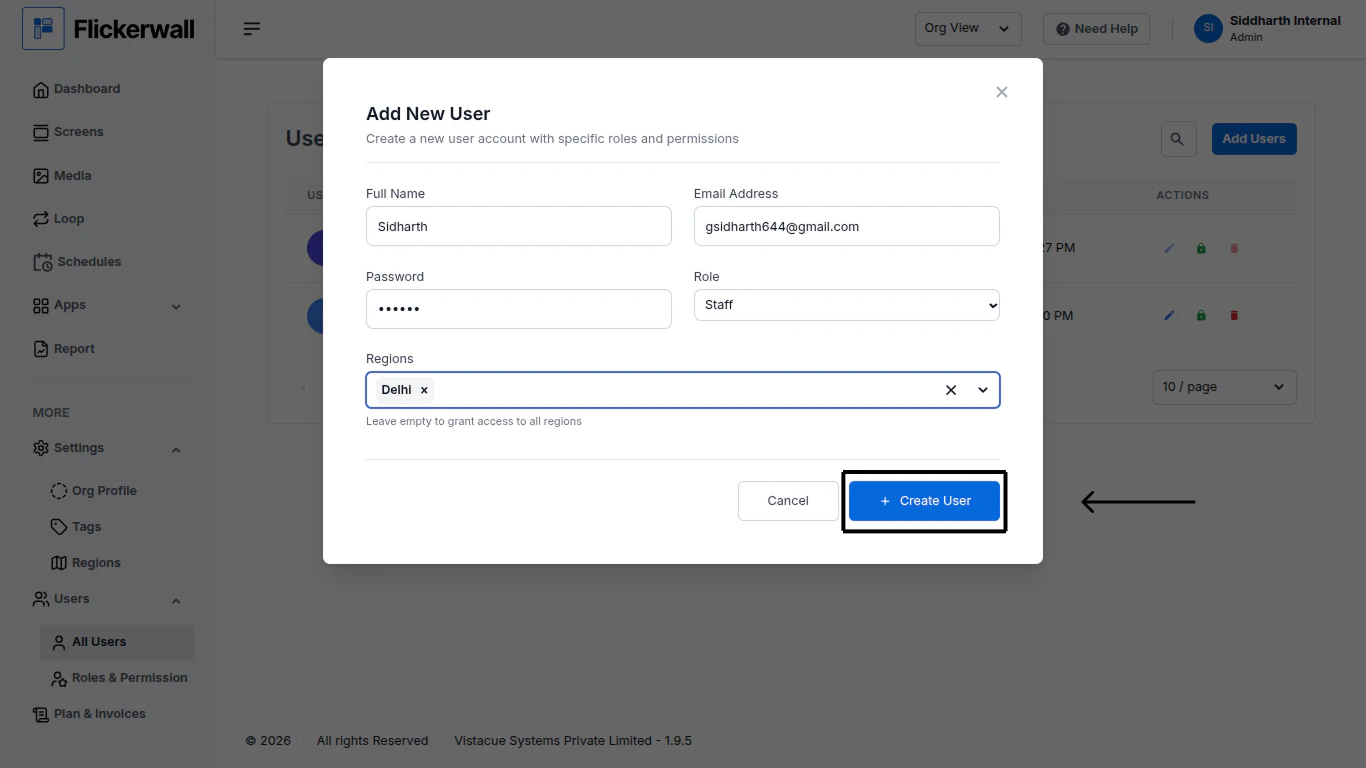
 Step 7
Once you are done with filling the information
Click on “Create User”
Step 7
Once you are done with filling the information
Click on “Create User”
 Step 8
**Email Verification & Login credentials**
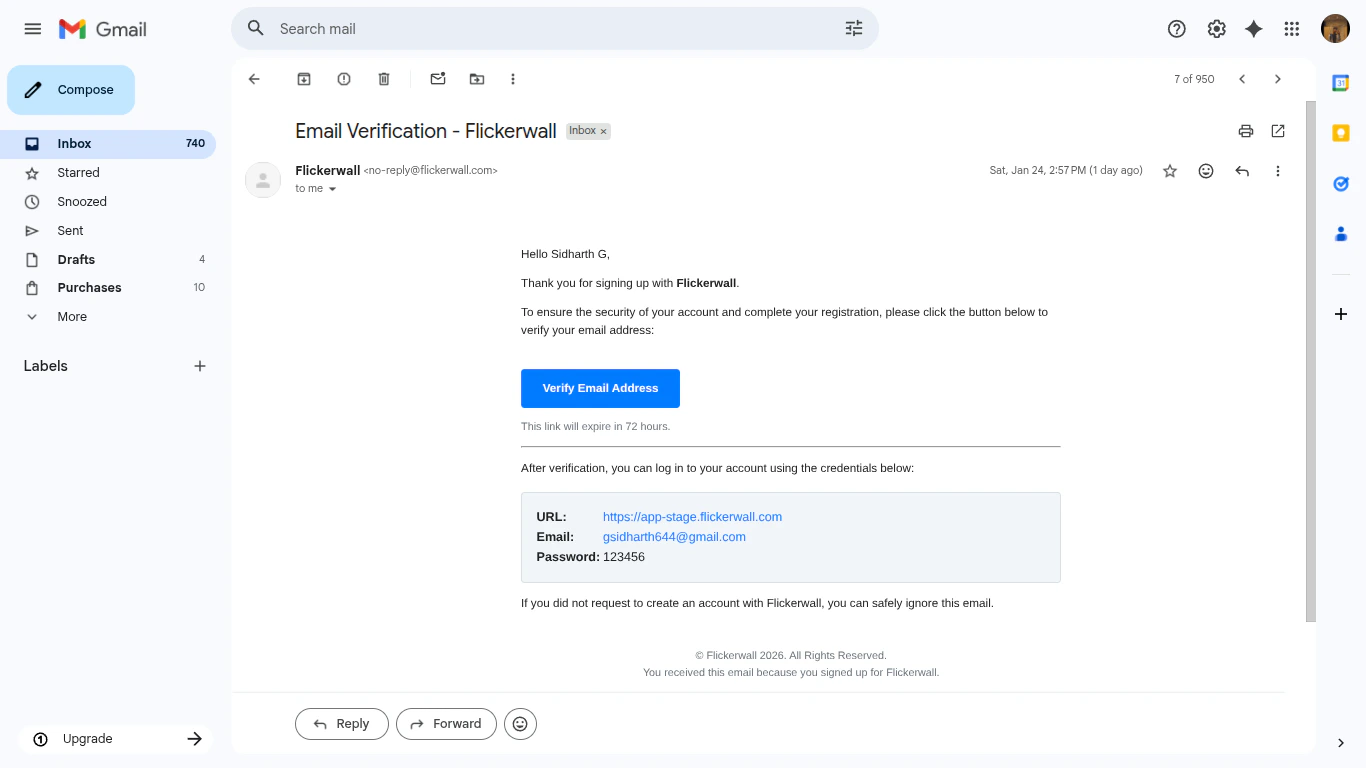
The Added User will Receive an Email with their Login Credentials and a Verification Code
Ask the User to click on “Verify Email Address” and the User will be redirected on the Webapp
Enter the Login Credentials provided in the Verification Email
Step 8
**Email Verification & Login credentials**
The Added User will Receive an Email with their Login Credentials and a Verification Code
Ask the User to click on “Verify Email Address” and the User will be redirected on the Webapp
Enter the Login Credentials provided in the Verification Email