> ## Documentation Index
> Fetch the complete documentation index at: https://docs.flickerwall.com/llms.txt
> Use this file to discover all available pages before exploring further.
# How to create a custom layout for my loop?
> Learn how to Create a Custom Layout for your Loops.
***
Step **1**
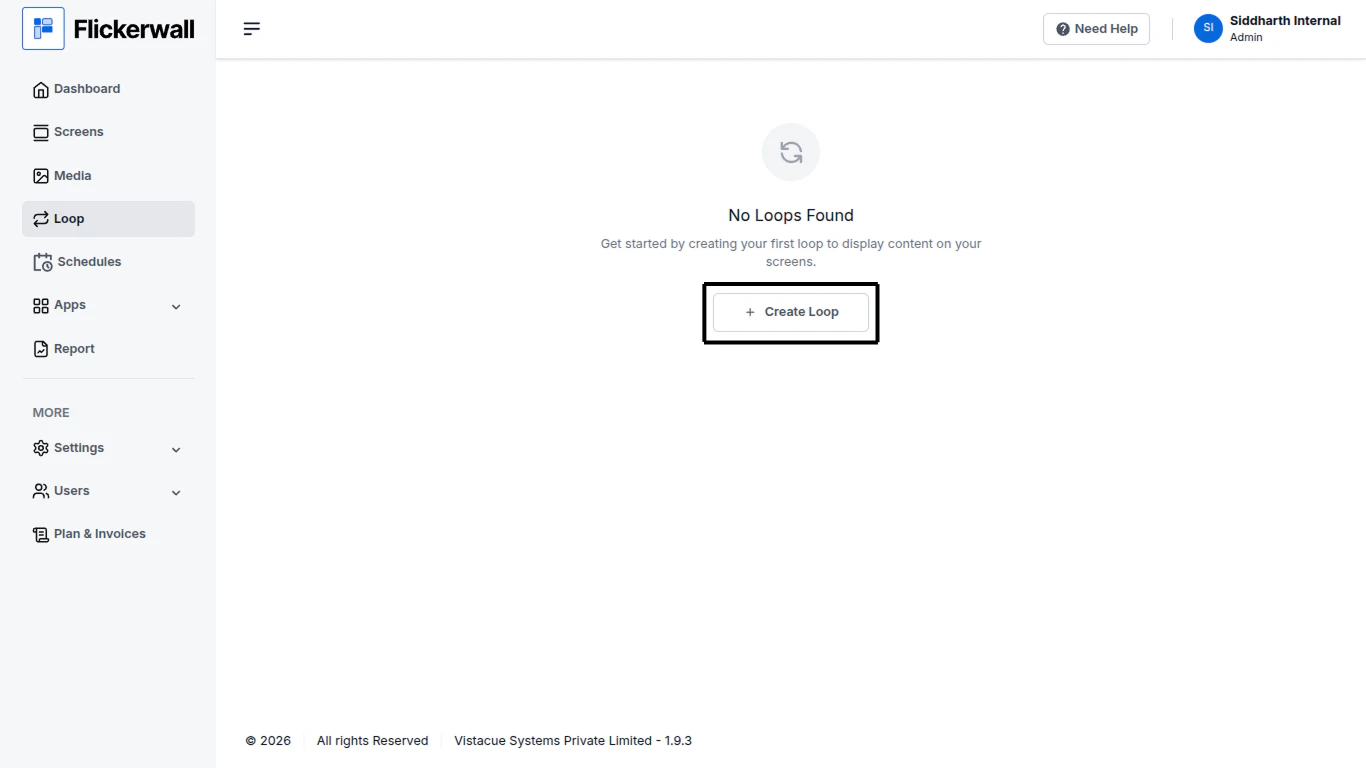
**Click Loop and Create Loop**
Select the desired Layout for your Loop or Click on Create Custom Layout if your plan doesn’t go with our default Layout options
 Step 2
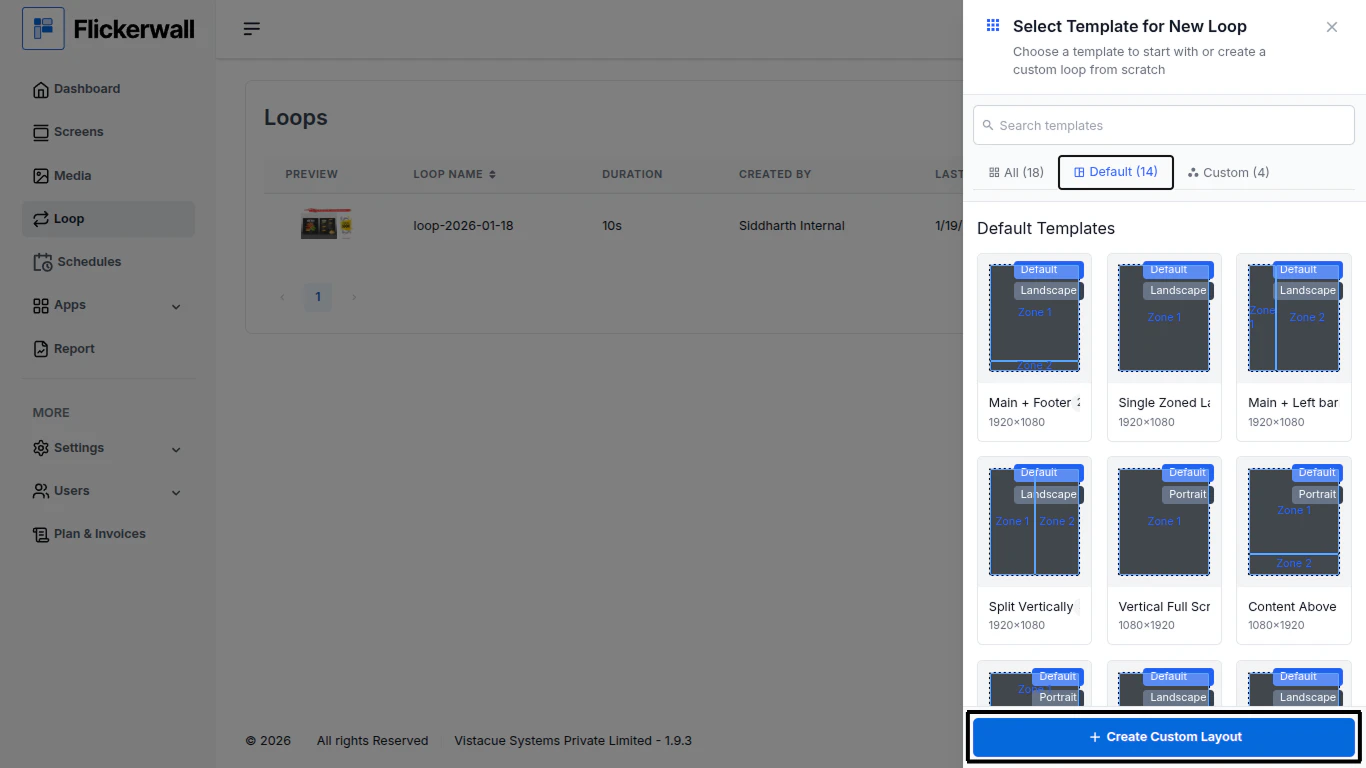
Click on “Create Custom Layout”
Step 2
Click on “Create Custom Layout”
 Step **3**
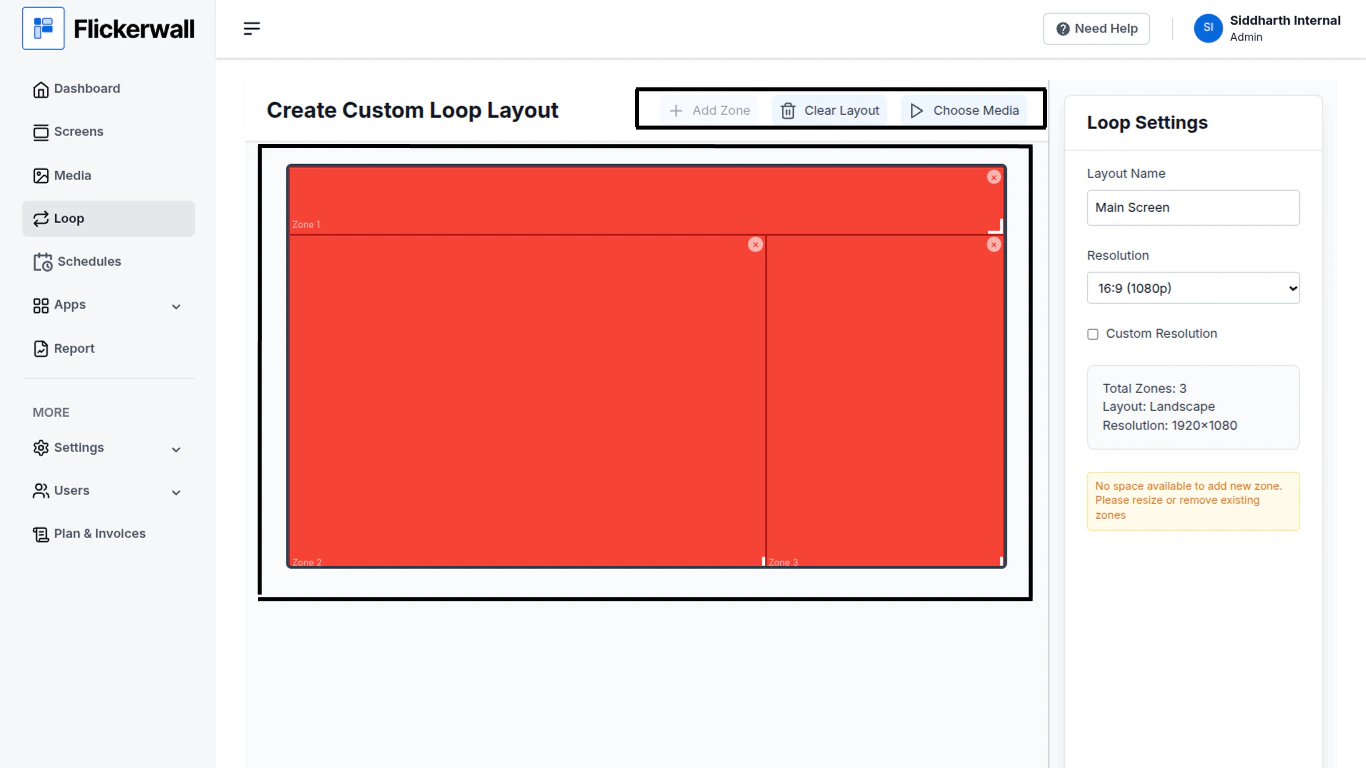
**Drag and Resize the zones , add new zones , Create your desired Layout**
**If you did’t like the layout you can always fix it , you can remove the unwanted zones by clicking on the X button within the created zone or delete the entire layout to start from start by clicking on '“Clear Layout”**
Step **3**
**Drag and Resize the zones , add new zones , Create your desired Layout**
**If you did’t like the layout you can always fix it , you can remove the unwanted zones by clicking on the X button within the created zone or delete the entire layout to start from start by clicking on '“Clear Layout”**
 Step **4**
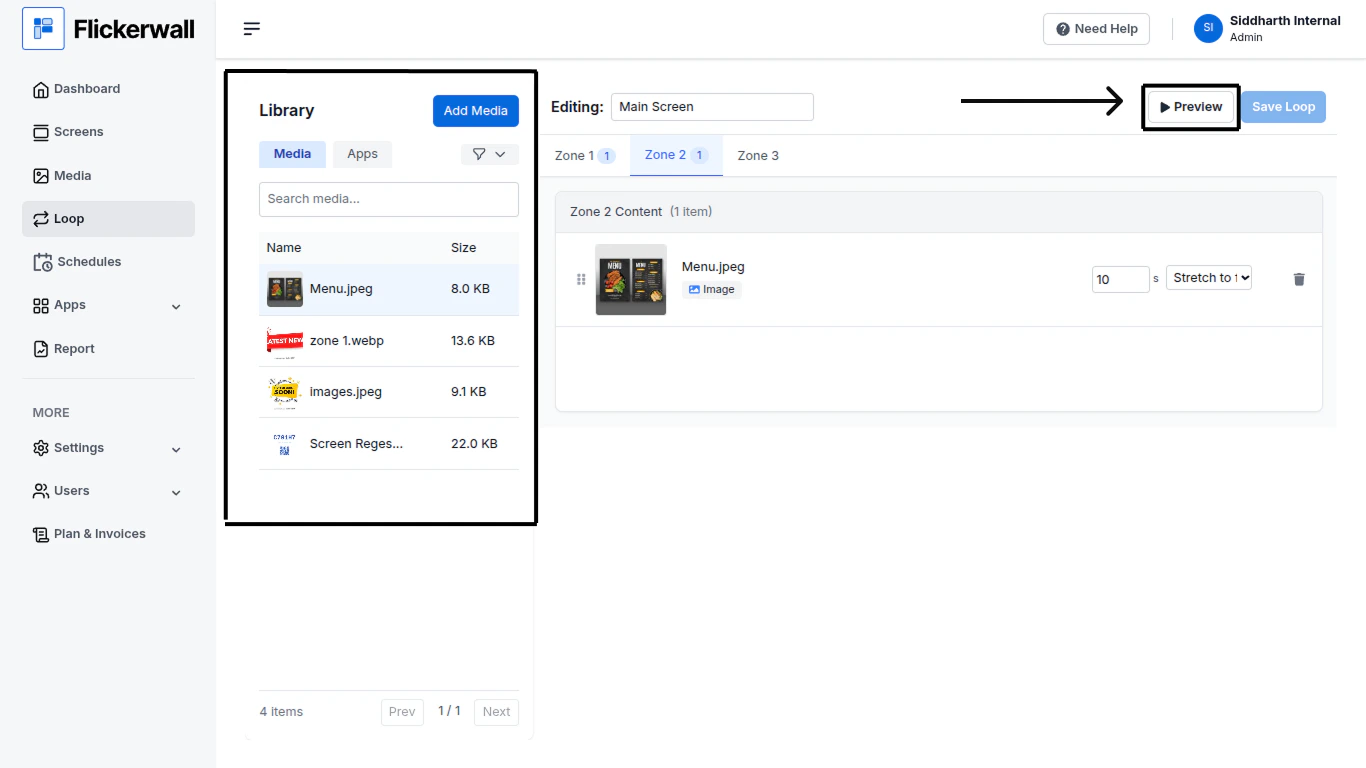
**Add Media to the Loop we just created**
**Select the media you want to add in the respective zones , make sure you are not adding all the media in only one zone click on the zone you intend to add the media to and add the desired media**
Step **4**
**Add Media to the Loop we just created**
**Select the media you want to add in the respective zones , make sure you are not adding all the media in only one zone click on the zone you intend to add the media to and add the desired media**
 Step 5
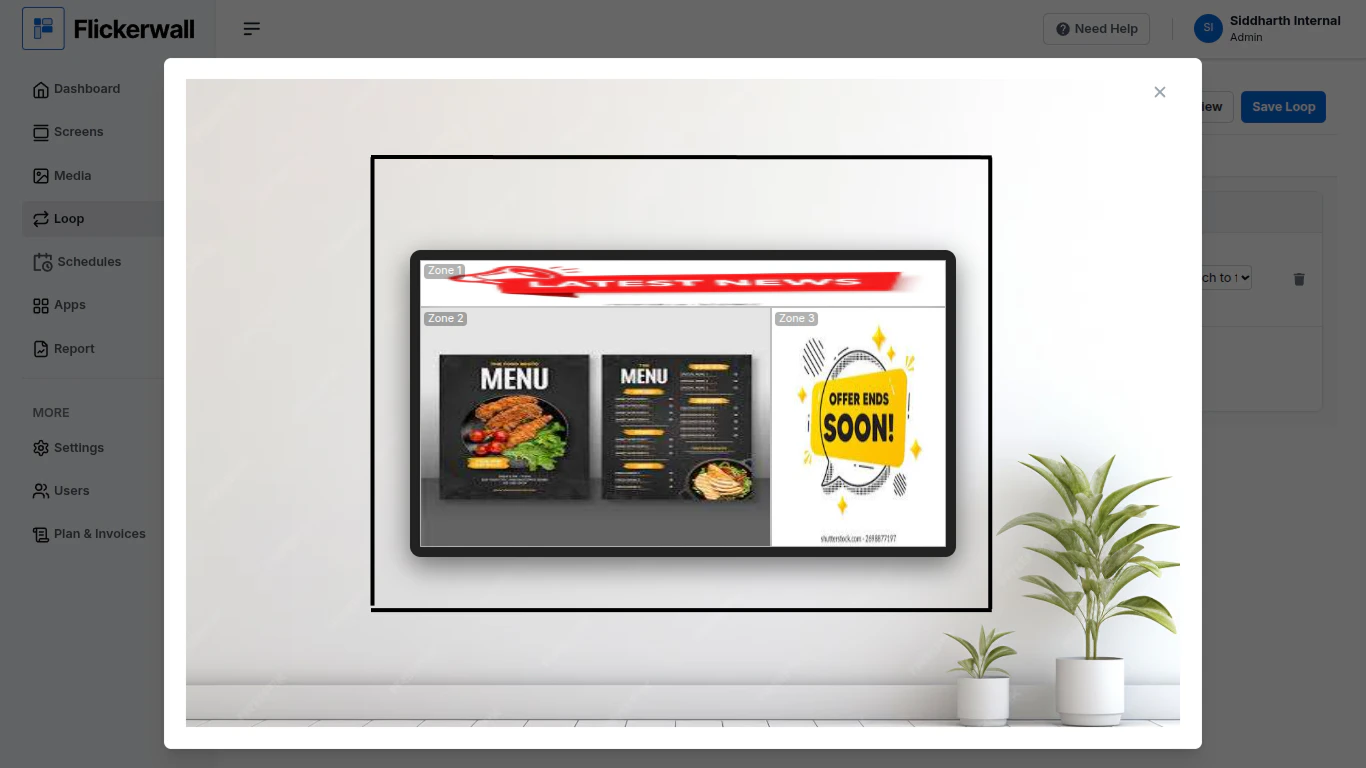
Preview the Layout
Sometimes the Images aspect ratio may not support the outcome you intend as per showed below
it’s always better to check if the preview shows the Layout working Fine
Step 5
Preview the Layout
Sometimes the Images aspect ratio may not support the outcome you intend as per showed below
it’s always better to check if the preview shows the Layout working Fine
 Step 6
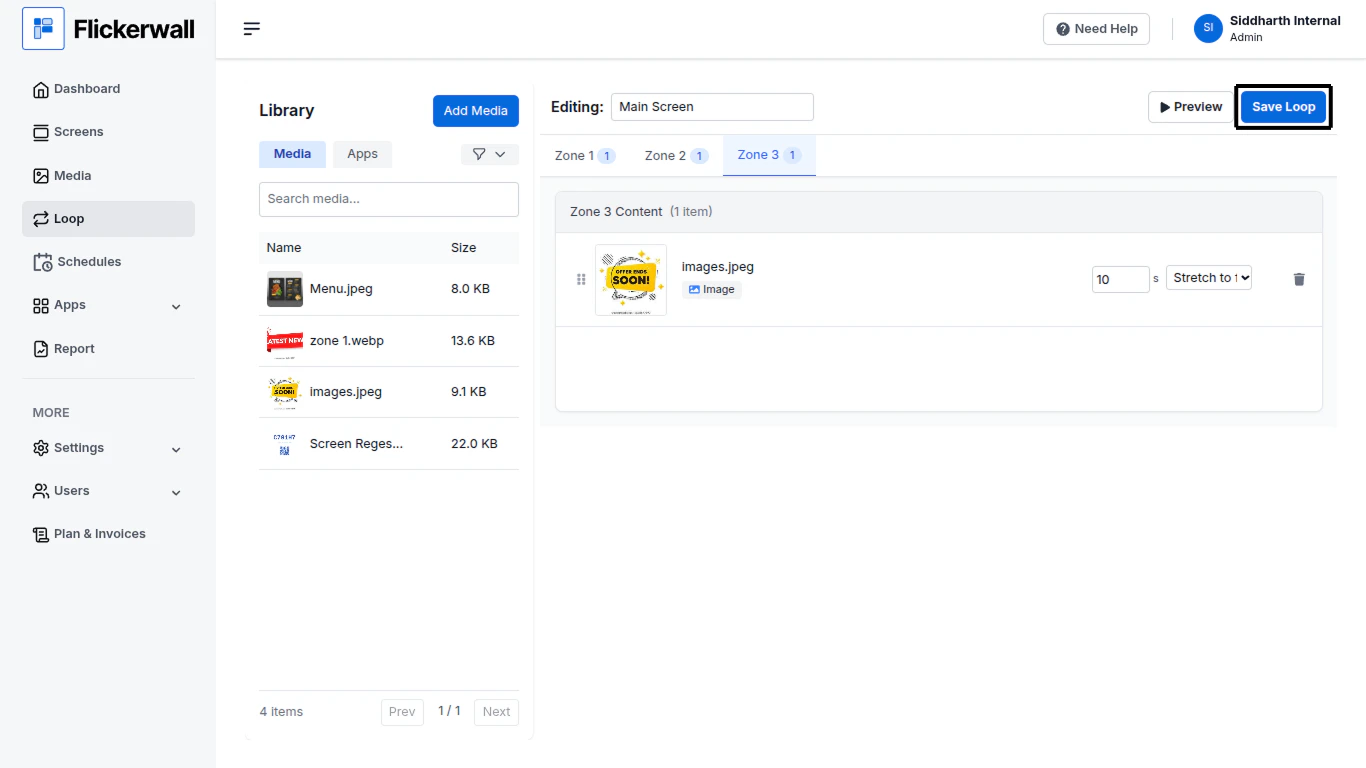
Save the Loop
once you are satisfied with the settings go ahead and save the loop by Clicking the “Save Loop” button
the Created Loop will Now appear in you Loop window .
Step 6
Save the Loop
once you are satisfied with the settings go ahead and save the loop by Clicking the “Save Loop” button
the Created Loop will Now appear in you Loop window .
 (funfact : if you want to use this created Layout again you don’t have to Create it again , when creating a new loop check under “Custom” Layouts all your Created Layouts are Stored there!)